

Butler wall panel replacement is the process of removing and installing new metal wall panels on an existing Butler Manufacturing building. Getting it right means understanding panel profiles, sourcing compatible materials, and choosing between a full tear-off or an overlay approach.
When a Butler building starts showing its age through rusting seams, water infiltration, or visible panel damage, the instinct is often to patch and move on. That approach works short-term, but at some point the math shifts. Repairing a failing panel section repeatedly costs more over five years than replacing it once with properly matched material, and you can get a new butler building replacement parts quote to understand the actual economics. This article walks you through the full picture of what Butler wall panel replacement actually involves, from diagnosing the need to selecting materials and managing the installation process.
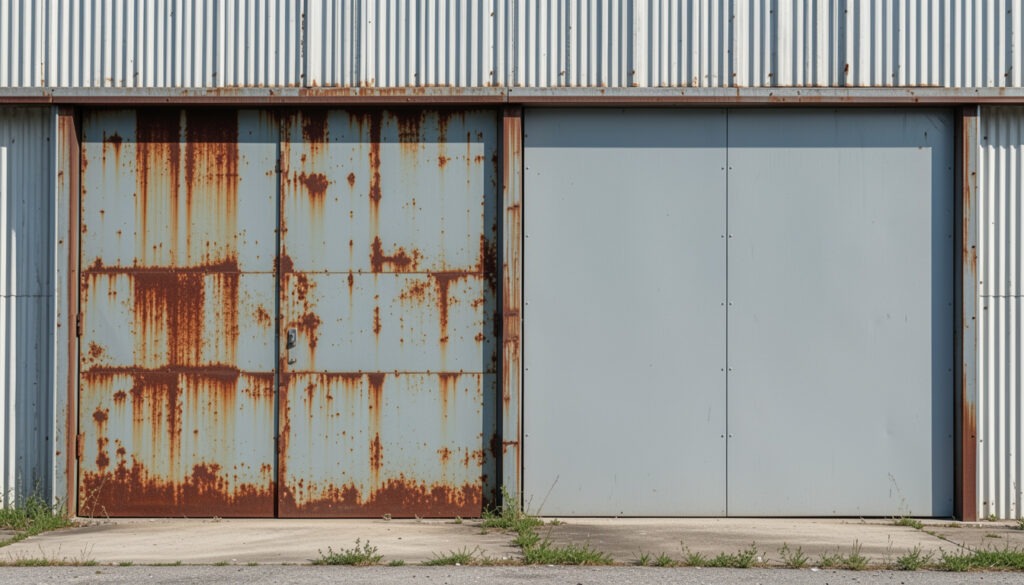
Why Butler Wall Panels Fail and When Replacement Makes Sense
Butler Manufacturing has been producing pre-engineered metal buildings since the 1900s, and many structures built in the 1970s, 1980s, and 1990s are now reaching the end of their wall panel service life. Several factors accelerate that degradation.
Common causes of Butler wall panel failure:
- Galvanic corrosion at fastener points, especially where dissimilar metals contact each other
- Panel coating breakdown from UV exposure, leading to chalk and fade followed by rust
- Physical damage from impact, wind-driven debris, or vehicle contact
- Moisture intrusion at panel laps where sealant has dried and cracked over decades
- Thermal cycling that causes panels to expand and contract, eventually loosening fasteners and opening seams
The threshold for replacement rather than repair generally comes down to three factors: how much surface area is affected, whether the structural integrity of the panel system is compromised, and whether matching replacement material is still available for that specific profile.
Butler panels produced before the mid-1990s used profiles and gauges that are not always stocked at standard metal building suppliers. This is a critical detail because mismatched panels create gaps in weather tightness and can look inconsistent in a way that affects property value. If your building’s original profile has been discontinued, you face a choice: source custom-rolled material to match, use a compatible profile that works with the existing framing, or go the overlay route.
Understanding Butler Panel Profiles and Compatibility
Not all metal wall panels are interchangeable. Butler uses proprietary panel profiles across different product lines, and each has specific rib spacing, depth, and attachment methods. The most common profiles found on older Butler buildings include the MR-24 standing seam roof system (which often pairs with specific wall panel designs) and various exposed fastener wall panels in different rib configurations.
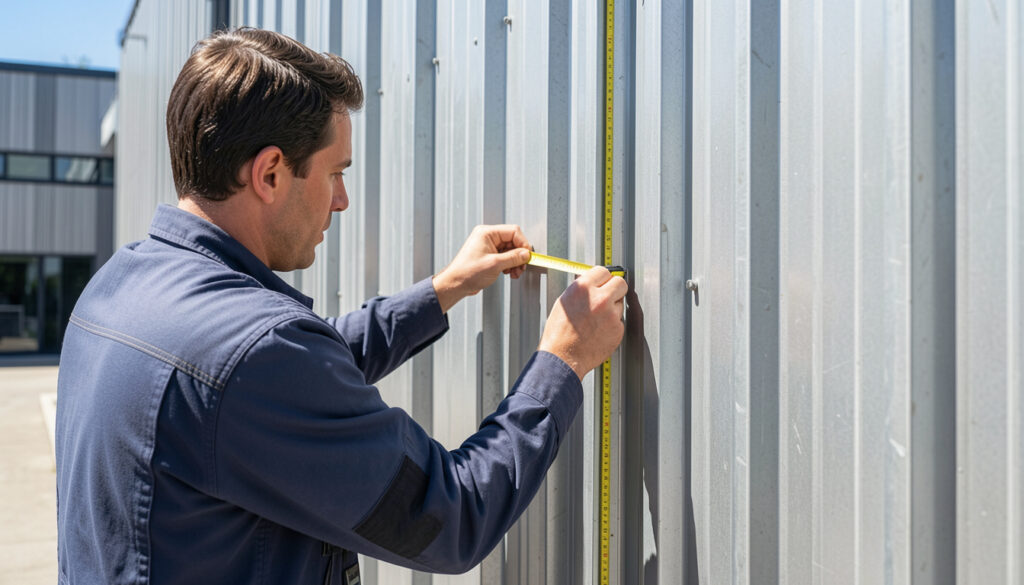
Before ordering any replacement panels, you need to physically measure the existing panels on your building. The key measurements are:
- Panel width (coverage width, not total width)
- Rib height and spacing
- Panel gauge (thickness)
- Fastener pattern and location
- Original coating system or paint color
Color matching is another challenge that building owners underestimate. A Butler building from 1985 painted in a Galvalume-based tan will not match a standard off-the-shelf color from today’s coil coaters without a custom color run. Some suppliers can match original Butler colors with a custom paint order, but that usually requires a minimum quantity order.
If you are replacing a small section of damaged panels and exact color match matters, plan for the reality that new panels will likely look slightly different from weathered originals. Many building owners choose to replace entire wall sections rather than single panels specifically to avoid visible patchwork appearance.
Tear-Off vs. Overlay: Choosing the Right Method
One of the biggest decisions in any Butler wall panel replacement project is whether to tear off the existing panels completely or install new panels over the top of the old ones. Both methods have legitimate applications, and the right choice depends on the condition of your existing framing, insulation situation, and budget.
Full Tear-Off:
A full tear-off involves removing all existing wall panels down to the structural framing, inspecting the girts (horizontal framing members) for damage, replacing insulation as needed, and installing new panels from scratch. This method is more labor-intensive and generates more waste, which adds to disposal costs. However, it gives you a clean slate. If your existing panels have significant rust that could transfer to new panels, or if your insulation is wet and needs replacement, a full tear-off is often the smarter long-term investment.
Panel Overlay:
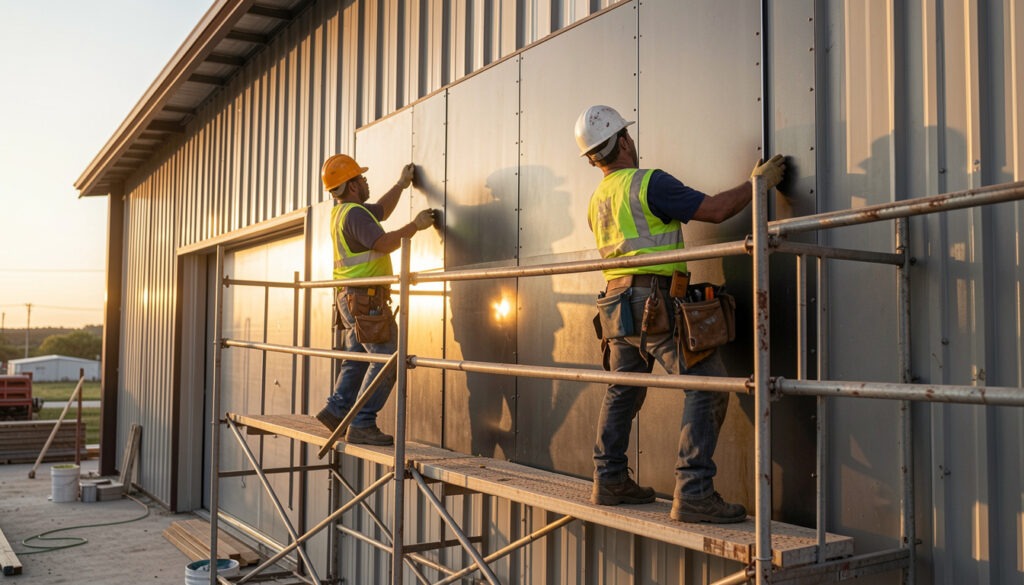
An overlay involves installing new metal wall panels directly over the existing ones. This approach saves labor time, eliminates the need for disposal of the old panels, and can actually add a layer of thermal performance depending on the design. The challenge is that the overlay adds thickness to your wall assembly, which can affect door and window frames, trim details, and sill conditions. It also locks in whatever problems exist beneath the surface, so if there is active moisture intrusion or insulation damage, those issues will continue unaddressed.
For roof systems, the overlay concept is well established, and you can read more about how that process works with the butler building reskin tear off replacement metal overlay approach, which shares many of the same decision-making principles applicable to wall panels.
The overlay method works best when the existing panels are structurally sound but cosmetically failing, when the building is occupied and a full tear-off would disrupt operations, or when the budget does not support a full replacement project.
What the Replacement Process Looks Like in Practice
Whether you choose tear-off or overlay, the basic sequence of a Butler wall panel replacement project follows a predictable path. Understanding the steps helps you ask better questions when getting quotes and set realistic expectations for timeline and disruption.
Step 1: Condition Assessment
Before any material is ordered, a qualified metal building contractor should inspect your existing panels, girts, fasteners, and sealant conditions. This assessment identifies whether any structural repairs are needed before new panels go on and what the actual scope of work involves.
Step 2: Panel Selection and Ordering
Based on the assessment, you select a compatible replacement panel profile and place your order. Lead times for custom-rolled panels or specialty profiles can run four to eight weeks, so factor this into your project timeline. Standard profiles from major coil suppliers may ship faster, but compatibility verification is essential.
Step 3: Site Preparation
For a tear-off, this means removing existing panels carefully to avoid damaging the framing. For an overlay, it means cleaning the existing surface, addressing any fastener pull-through, and installing any necessary furring or sub-framing components.
Step 4: Panel Installation
New panels are installed per the manufacturer’s installation specifications, starting from a defined base condition and working upward. Fastener type, spacing, and torque all matter for weather tightness and panel performance.
Step 5: Trim, Sealant, and Flashing
Trim details at corners, base conditions, eave transitions, window and door openings, and any wall penetrations are completed and sealed. This is where many lower-cost installations cut corners, and it is exactly where future leaks originate.
Step 6: Final Inspection
A thorough walkthrough to verify panel alignment, fastener installation, sealant completeness, and trim condition closes out the work. Any punch list items should be addressed before the contractor leaves the site.
Cost Factors That Affect Your Budget
Butler wall panel replacement costs vary significantly based on building size, panel selection, access conditions, and regional labor markets. Rather than quoting numbers that may not reflect your specific situation, it is more useful to understand which variables drive cost in either direction.
Factors that increase project cost:
- Custom panel profiles or colors requiring specialty fabrication runs
- Difficult access conditions such as tall walls requiring extensive scaffolding
- Significant girt or framing repair needed before new panels can be installed
- Asbestos abatement required if insulation or sealants from older buildings contain regulated materials
- Occupied building requiring phased work to minimize operational disruption
Factors that reduce project cost:
- Standard panel profiles available from regional stock
- Simple single-story buildings with straightforward access
- Good existing framing condition requiring no structural repair
- Willingness to accept a standard color rather than custom matching
Getting accurate pricing requires a site-specific quote. If you are ready to understand what your project would cost, a new butler building replacement parts quote gives you a starting point tailored to your building’s actual specifications.
Selecting a Contractor with Metal Building Experience
This is where many building owners make a costly mistake. General commercial contractors may be competent in many areas, but Butler wall panel replacement requires specific knowledge of metal panel systems, attachment methods, and Butler-specific framing details that a generalist contractor may not have encountered.
When evaluating contractors, look for these indicators of relevant experience:
- Direct experience with pre-engineered metal building renovation projects
- Familiarity with Butler or other major manufacturer building systems
- References from comparable commercial or industrial panel replacement projects
- Understanding of the specific panel profile you are using and its attachment requirements
- Proper insurance coverage for commercial roofing and wall panel work
Ask potential contractors whether they have worked with your specific panel profile before, how they handle color matching challenges, and what their process is for inspecting and addressing framing conditions discovered during tear-off. Their answers will quickly reveal their actual experience level.
Material Options Beyond Standard Repaint
Not every aging Butler building needs identical panel-for-panel replacement. In some situations, building owners choose to upgrade the wall system during replacement rather than simply restoring what was there before.
Options worth considering include:
- Higher-gauge panels for improved dent resistance and longevity in high-traffic areas
- Insulated metal panels (IMPs) that combine the wall skin and insulation into a single factory-assembled unit, improving energy performance significantly
- Different panel profiles that offer better water management or a more contemporary appearance
- High-performance coatings such as Kynar 500 (PVDF) that offer substantially better color retention and corrosion resistance than standard polyester coatings
Each of these upgrades adds cost at the front end but reduces maintenance frequency and can meaningfully improve your building’s energy performance and curb appeal. If your Butler wall panel replacement is being triggered by significant deterioration, it is worth the conversation with your contractor about whether upgrading the system during the project makes economic sense over a 20- to 30-year horizon.
When planning any wall work, it is also worth evaluating the roof at the same time. Addressing wall and roof systems together during a scheduled project often reduces total mobilization costs compared to treating them as separate projects years apart.
The Bottom Line on Butler Wall Panel Replacement
Butler wall panel replacement is a manageable project when you approach it with the right information upfront. Know your panel profile, understand the tear-off versus overlay trade-offs, verify contractor experience before signing anything, and get a site-specific quote that reflects your building’s actual conditions rather than a generic per-square-foot estimate. The buildings that have aged gracefully are the ones where owners made informed decisions at the replacement stage rather than deferring maintenance until structural problems compounded the cost.
Your next step is straightforward: get a qualified metal building contractor on-site to assess your current panel condition and provide a scope-based quote. That conversation will give you the concrete numbers and options you need to make a decision that fits your building, your operations, and your budget.
Things to Know
- Butler panel profiles are proprietary, meaning not every metal panel supplier can fabricate a direct match. Always verify compatibility with your specific building’s profile before ordering material.
- Older Butler buildings constructed before the mid-1990s may have panels coated with lead-based paint or insulation containing regulated materials. A pre-project hazardous materials assessment protects you from unexpected abatement costs and legal liability.
- Color matching on weathered Butler panels is rarely perfect. New panels coated to the original specification will still look visually different next to panels that have been exposed to UV for 20 or 30 years. Plan replacement scope with that reality in mind.
- The girts behind your wall panels matter as much as the panels themselves. Corroded or deflected girts will cause new panels to perform poorly regardless of panel quality. Always inspect framing before closing up a new wall system.
- Fastener selection is not a minor detail. Using the wrong fastener type or spacing pattern can void panel warranties and create leak points within a few years of installation.
- Building permits are required for wall panel replacement in most U.S. jurisdictions, particularly when the project involves structural framing work or changes to the building envelope. Check with your local building department before work begins.
Key Takeaways
- Butler wall panel replacement is not a one-size-fits-all project. Panel profile, gauge, coating system, and framing condition all influence your material choices and installation method.
- Tear-off and overlay are both legitimate approaches, but each has specific conditions where it performs best. Choosing the wrong method based on cost alone creates problems that outlast the savings.
- Sourcing compatible replacement panels for older Butler buildings requires extra lead time. Custom profiles and color matches can add four to eight weeks to your project timeline.
- Contractor experience with metal building systems matters more than general commercial construction credentials. Verify that your contractor has direct experience with pre-engineered metal building renovation.
- Addressing wall and roof systems during the same mobilization typically reduces total project cost compared to treating them as separate jobs in different years.
- Getting a site-specific quote is the only reliable way to understand what your project will actually cost. Generic per-square-foot estimates do not account for the variables that drive real-world pricing.
Start Your Butler Wall Panel Replacement the Right Way
Every week you wait on failing panels is another week of potential water intrusion, insulation damage, and escalating repair costs working against your budget. Getting a professional assessment now puts you in control of the timeline and the scope before small problems become structural ones. Click below to request a new butler building replacement parts quote and get pricing based on your building’s actual specifications, not a ballpark guess.
Frequently Asked Questions
Q: How do I know if my Butler wall panels need full replacement or just repairs?
If more than 20 to 25 percent of a wall section shows active corrosion, sealant failure, or coating breakdown, replacement is usually more cost-effective than ongoing repairs.
Spot repairs make sense when damage is isolated to a small area and the surrounding panels are structurally sound with intact coatings. Once corrosion spreads across multiple panels or moisture has reached the insulation behind the wall system, the cumulative repair cost typically surpasses what a one-time replacement would have cost. A qualified metal building contractor can assess the threshold for your specific situation during an on-site inspection.
Q: Can I install new wall panels over my existing Butler panels without removing them?
Yes, an overlay installation is a viable option when the existing panels are structurally intact and there is no active moisture infiltration or wet insulation behind the current wall system.
The overlay method saves labor and disposal costs, but it adds thickness to your wall assembly. That added thickness affects how doors, windows, trim, and base conditions need to be detailed, so those transitions require careful planning. If the existing panels have significant rust or the insulation is compromised, overlay installation traps the problem rather than solving it.
Q: How long does a Butler wall panel replacement project typically take?
Project duration depends heavily on building size, panel availability, and whether a full tear-off or overlay approach is used, but most mid-size commercial buildings can expect two to six weeks of active installation time.
Material lead time is often the longest variable. Standard profiles from regional stock may ship within one to two weeks, while custom-rolled panels or specialty color orders can take four to eight weeks. Scheduling around occupied building operations or working in phases adds time as well. Planning your project well in advance of when you need it completed gives you the most flexibility on contractor scheduling and material sourcing.
Q: Will replacement panels match the original color of my Butler building?
An exact color match is difficult to achieve on a building where the original panels have been weathering for decades, even when new panels are coated to the original Butler color specification.
UV exposure causes original panels to fade and chalk over time, while new panels arrive with fresh, consistent coating. The visual difference is most noticeable when replacing only a portion of a wall section. Many building owners address this by replacing full wall elevations at once rather than individual panels, which creates a cleaner visual result. Some suppliers can produce custom color matches that get closer to the weathered tone, but this typically requires a minimum quantity order.
Q: Do I need a building permit for Butler wall panel replacement in the United States?
In most U.S. jurisdictions, replacing metal wall panels on a commercial building requires a building permit, particularly when the work involves changes to the building envelope or any structural framing.
Requirements vary by city, county, and state, so the only reliable answer comes from your local building department. Permits exist to ensure the work meets current building codes for weather resistance, energy performance, and structural integrity. Working without a required permit can create complications during property sales, insurance claims, and future inspections. A reputable metal building contractor will include permit acquisition as part of their project scope rather than bypassing it to reduce upfront paperwork.
Where to Go From Here With Butler Wall Panel Replacement
Understanding the full scope of what Butler wall panel replacement involves puts you ahead of most building owners who wait until a leak or visible structural failure forces their hand. The buildings that hold their value and avoid expensive emergency repairs are the ones where owners treated wall panel deterioration as a scheduled capital improvement rather than a crisis response.
Your most productive next step is scheduling an on-site condition assessment with a contractor who has direct experience with pre-engineered metal building systems. Bring your original building documents if you have them, note any areas where you have noticed water staining, fastener corrosion, or panel distortion, and ask specific questions about panel profile compatibility and framing condition. That conversation will move you from uncertainty to a clear, costed plan of action faster than any amount of online research.